
SEO Website Migration Checklist
Jun 22, 2026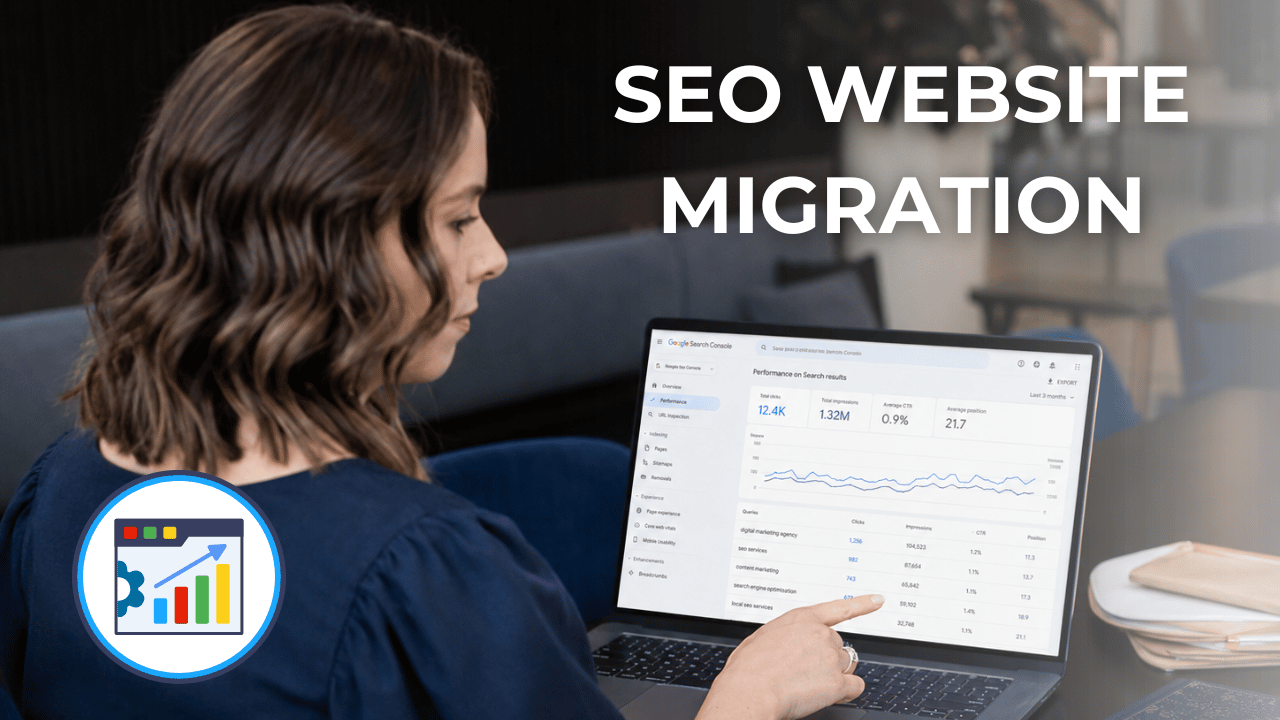
How to Move from WordPress to Kajabi Without Losing Your Google Rankings
Migrating your website from WordPress to Kajabi can feel like a beautiful fresh start.
You finally get to bring your website, online courses, checkout pages, email marketing, automations, and customer journey into one simpler system.
But here is the part that needs extra care: your SEO.
A website migration is not just a design project. It is also a visibility project. If your old WordPress website has blog posts, course pages, sales pages, or product links, they probably have Google rankings. You want to make sure all that hard-earned SEO value is protected when you move into Kajabi.
This is especially important if you sell online courses, digital products, memberships, coaching programmes or have a blog that brings in organic traffic.
The goal is simple: when someone clicks an old link, finds you on Google, opens an old blog post, or follows a product link, they should still land exactly where they need to go.
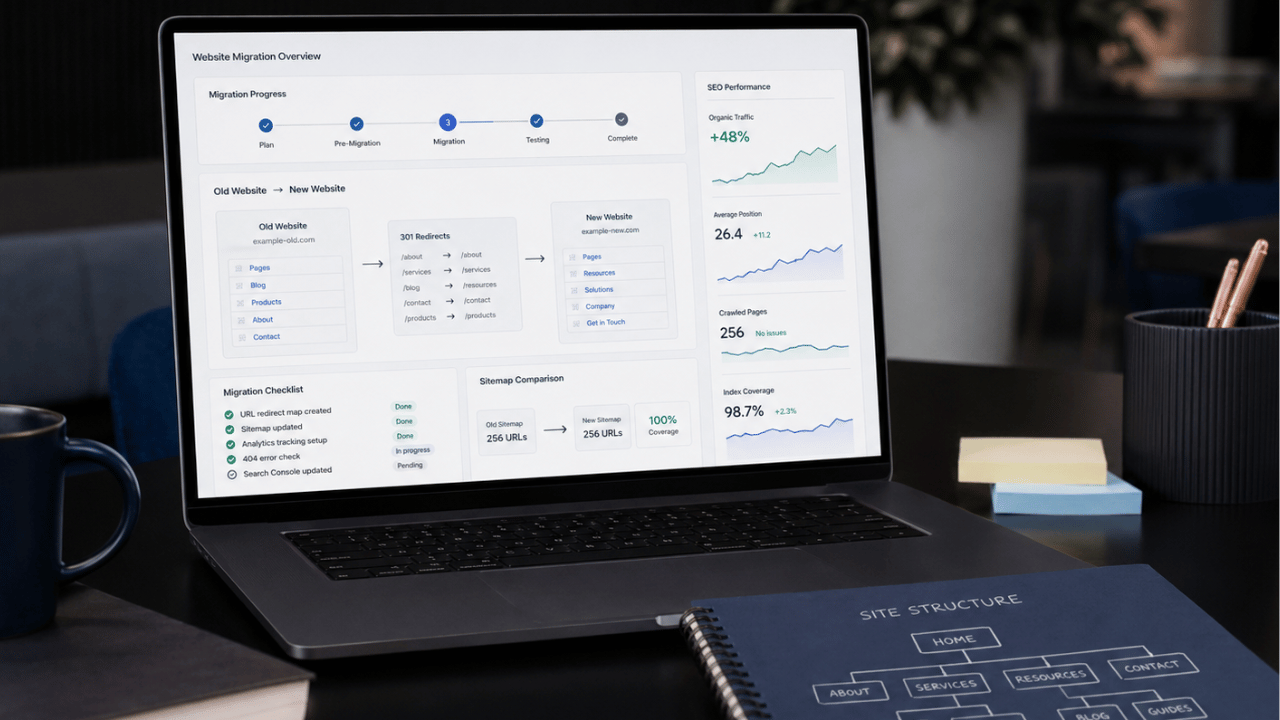
To migrate from WordPress to Kajabi without losing too much SEO map every old URL to its new Kajabi URL, keep URL paths the same where possible, set up redirects for changed URLs, copy across metadata, update internal links, test every checkout and course pathway, submit your sitemap, and monitor Google Search Console after launch.
Why SEO Matters During a WordPress to Kajabi Migration
When Google understands your old website, it has already built trust with your URLs, page structure, internal links, metadata and website content.
If you suddenly move platforms and change everything at once, Google will need to relearn your entire site. That can lead to ranking drops, broken links and lost traffic.
This does not mean you should avoid migrating. It simply means the migration needs a proper SEO plan.
Think of it like moving house. You can absolutely move somewhere better, calmer and more aligned. But you still need to redirect the mail, tell people where to find you, label the boxes and make sure nothing important gets left behind.
Your website needs the same level of care. In this blog, I will show you how.
Your Website Migration Checklist:
Step 1: Create a Full URL Migration Map
Before you build anything in Kajabi, create a spreadsheet of every URL on your current WordPress website. This is where your sitemap will come in handy. You can most likely find it at yourwebsite.com/sitemap.xml
Your spreadsheet will include:
- Website pages
- Blog posts
- Sales pages
- Landing pages
- Course pages
- Checkout pages
- Product pages
- Freebie opt-in pages
- Thank you pages
- Contact pages
- Any and every other page you can find
Include the following columns in your spreadsheet:
- Old WordPress URL
- New Kajabi URL
- Page title
- Meta description
- Image alt text notes
- Redirect required: yes or no
- Status: drafted, built, checked, live
Where possible, ensure that your new Kajabi page uses the exact same URL path as the old WordPress page.
For example:
- Old WordPress URL:
yourdomain.com/about - New Kajabi URL:
yourdomain.com/about - Old WordPress blog post:
yourdomain.com/blog/how-to-plan-your-blog - New Kajabi blog post:
yourdomain.com/blog/how-to-plan-your-blog
This is one of the simplest ways to reduce SEO disruption.
Planning a website migration?Busy Made Simple are Kajabi Experts, supporting service based business owners in building Kajabi websites and full business ecosystems that sell online courses, while also connecting Shopify to sell physical products. Organise your website migration properly from the start by brining in the experts. Check it out here. |
Step 2: Match Old URL Paths Wherever Possible
If your WordPress website already has strong SEO, avoid changing URL paths during the migration, unless you have a very clear reason.
That means your Kajabi pages should match the old paths.
Examples here include:
- Home page: /
/services/blog/post-name-here/online-course-name/free-resource-name
This matters because Google, email links, Pinterest pins, social media links and any other backlinks will be pointing to your existing URLs. This is all to avoid that dreaded "404 error"!
If you can keep those URL paths the same, you make the transition to your new platform so much smoother (and easier).
Step 3: Redirect Any URLs You Cannot Match
Sometimes you will not be able to match every old WordPress URL in Kajabi.
This can happen when:
- The page structure changes
- The old page is being combined with another page
- A product is moving to Shopify
- A course sales page is being rebuilt
- The old URL format does not work cleanly inside Kajabi
- i.e. your old blog path was /blog-title and your Kajabi blog path is /blog/blog-title (damnnnnn!)
- Old pages are being removed
In these cases, you need to redirect the old URL to the most relevant new page.
A redirect tells visitors and search engines, “This page has moved over here.”
For example:
- Old URL:
/old-course-page - New URL:
/courses/new-course-page
Or, if products are moving to Shopify:
- Old URL:
/resources/workbook-name - New Shopify URL:
https://shop.yourdomain.com/products/workbook-name
If you are using Kajabi and need to redirect an old page path, one workaround is to create a new landing page in Kajabi using the exact old URL path, then add custom redirect code to send visitors to the new destination.
This is not always as ideal as a server-level redirect, but it can be a practical solution inside Kajabi when you need to preserve old links.
Where possible, use a permanent 301 redirect rather than a temporary redirect or JavaScript-based workaround. If Kajabi cannot support the exact redirect setup you need, document the workaround carefully and test the old URL in Google Search Console after launch.
Step 4: Check All Internal Links in Kajabi
Internal links are links that point from one page on your website to another page on your website.
When building in Kajabi (or any platform), internal links should use the URL path only. They should not include the temporary Kajabi domain.
Do not link like this:
https://yourdomain.mykajabi.com/about
Instead, link like this:
/about
Examples:
- Home:
/ /about/blog/blog/post-name-here/course-name/contact
This matters because your Kajabi staging domain will change once the real domain is connected. If your internal links include the temporary Kajabi domain, users may be sent to the mykajabi URL after launch, which just doesnt give a good vibe to your users and can be bad for SEO.
Before going live, check every button, menu item, image link, blog link and call-to-action is going to the correct URL, not the mykajabi URL.
Step 5: Make External Links Open in a New Tab
External links are links that send people away from your main website.
This may include:
- Shopify product links
- YouTube videos
- Podcast platforms
- Booking calendars
- Affiliate links
- Client resources
- External articles
- Partner websites
Where possible, set external links to open up in a new tab or window.
This keeps your website open in the original tab, so the visitor can come back easily and you don't lose the connection with the audience on your site. It is a small user experience detail, but it really makes the customer journey feel smoother and more intentional.
Step 6: Handle Shopify Product Links Carefully
If your new Kajabi website connects to Shopify, be very careful with product links.
For example, your old WordPress website might have product URLs like:
/resources/workbook-name
But your new product may now live in Shopify at:
https://store.yourdomain.com/products/workbook-name
Every old product URL should be mapped to the correct new Shopify product URL. This can be tedious, but it is so essential!
Do not send all old product pages to the Shopify homepage unless there is truly no better match. A one-to-one redirect is the best option here.
This matters because someone may be clicking from Google with a very clear buying intent for a specific product. If they land on a general store page instead of the exact product, they may feel lost and just leave. Leading to bad customer experience, you're unable to help your customers, and no $$ for you.
Step 7: Redirect Old Course URLs
Online course websites often have old course sales pages, login pages, lesson preview pages, checkout pages and thank you pages floating around.
Before launch, make a list of every old course-related URL in your spreadsheet.
Ask yourself these questions:
- Is this course still available? If not, where can I redirect the audience to?
- Is the new course sales page using the same URL?
- Does the old checkout link still work?
- Are old email sequences linking to this page?
- Are old blog posts linking to this course?
- Are old freebie pages sending people to the right offer?
Any outdated course URLs should be redirected to the most relevant new course page, offer page, checkout page or waitlist page. Remember, we want to avoid those 404 errors like old dogs avoid handsy toddlers.
This is especially important if you have evergreen funnels running in the background somewhere.
Step 8: Copy Across Your Metadata
When migrating from WordPress to Kajabi, try to keep your SEO metadata as consistent as possible at launch.
This includes things like:
- SEO title text
- Meta description
- Image alt attributes
- Social sharing image
- Blog post titles
- Headings
- URL paths
If a page is already ranking, avoid changing the metadata too much during the migration.
You can always come back later and optimise the page once the new website has launched and Google has had time to settle.
A migration is not the best time to rewrite every title, change every URL and restructure every page. Too many changes at once can make it harder to understand what affected your SEO.
Step 9: Use Correct Heading Tags
Your headings help both people and search engines understand the structure of your page.
Every page should have one clear H1 heading. This is usually the main title of the page.
Then use H2 headings for major sections, and H3 headings for supporting sub-sections.
For example:
H1: Kajabi Website Design for Online Course Creators
H2: Build Your Website, Course and Funnel in One Place
H3: What We Set Up Inside Kajabi
H3: Who This Is Best For
H2: How the Website Build Process Works
H2: Book Your Kajabi Consultation
Do not choose headings just because they look pretty. Use them in the right order so the page has a clear structure.
Step 10: Test Before You Launch
Before launch day, test everything. Then retest everything again.
A handy list of what to check:
- Main menu links
- Footer links
- Blog post links
- Internal page links
- Buttons
- Forms
- Checkout links
- Course links
- Product links
- Thank you pages
- Redirect pages
- Mobile layout
- Metadata
- Image alt text
- Google Analytics
- Search Console
- Sitemap
- 404 page
After launch, test everything again.
Search for old URLs, click old email links, check Google Search Console for errors and keep an eye on traffic over the next few weeks. Watch when 404 errors pop up, and keep making necessary changes (further redirects) when you notice something is not quite right.
Some movement in rankings is normal after a migration. You do have to go into this expecting a dip in your SEO unfortunately. The goal is not to avoid every little fluctuation. The goal is to make the move as clean, calm and technically sound as possible.
After Launch: What to Monitor in Google Search Console
Once your Kajabi website is live, monitor Google Search Console closely for indexing issues, 404 errors, redirect problems, sitemap status and changes in search performance. Check your highest-value pages first, especially blog posts, course pages, sales pages and product pages that previously brought in organic traffic.
Your Migration At A Glance
A WordPress to Kajabi migration can be an incredible move for online course creators, coaches and digital product businesses.
Kajabi can simplify your website, offers, email marketing, course delivery and customer journey beautifully.
But your SEO needs to be protected as part of the process.
The most important thing is this: do not treat the migration as just a design project. But when designing your website, this Website Photoshoot Checklist will help.
 |
Before your next website photoshoot, download the free Brand Shoot Checklist. It will help you plan the key shots, styling, props, and website image types you need before shoot day. |
Treat it as a full website move.
Map your URLs. Match old paths to new. Redirect any old URLs. Copy across metadata. Check your headings. Keep internal links clean. Test and retest every pathway before and after launching.
Because when a migration is done properly, your new Kajabi website will not only look beautiful. It will also keep working hard behind the scenes, helping the right people find you, trust you and take the next step with your business.
Frequently Asked Questions
Should I rewrite my SEO titles and meta descriptions during a migration?
If a page is already ranking well, avoid changing too much during the migration. Carry across your SEO titles, meta descriptions, headings, image alt text and URL paths first, then optimise later once the new website has launched and rankings have settled.
What should I check after launching a migrated Kajabi website?
After launching a migrated Kajabi website, test main menu links, footer links, blog links, buttons, forms, checkout links, course links, redirects, thank you pages, mobile layout, metadata, image alt text, Google Analytics, Search Console, sitemap and 404 errors.
Can Kajabi redirect old WordPress URLs?
Kajabi can support practical redirect workflows, but the best setup depends on the URL structure and migration plan. Where an old WordPress URL cannot be matched exactly in Kajabi, it should be redirected to the most relevant new page to avoid visitors landing on a 404 page. Kajabi can support this redirect, however it does involve using code.
What should be included in a website migration checklist?
A website migration checklist should include old URLs, new URLs, page titles, meta descriptions, image alt text notes, redirect status, internal links, checkout links, course links, product links, forms, mobile checks, analytics, Search Console, sitemap checks and 404 testing.
Should I keep the same URLs when migrating from WordPress to Kajabi?
Yes, where possible. Keeping the same URL paths can reduce SEO disruption because Google, backlinks, email links, Pinterest pins and internal links may already point to those existing URLs.
How do I move from WordPress to Kajabi without losing SEO?
To move from WordPress to Kajabi without losing to much SEO, create a full URL migration map, keep URL paths the same where possible, redirect any URLs that change, copy across important metadata, update internal links, test forms and checkout links, submit your sitemap and monitor Google Search Console after launch. However, unfortunatley you should expect a change in SEO as Google and AI re-adjust to your new website and platform.

